If you believe that sewing a fly front zipper is a "complicated hassle" you are NOT alone, I felt that way for a long time!
Avoided sewing them whenever possible! Making designs that didn't require them or asking someone else to do it for me was usual practice 
That's until I learned this wonderful sewing technique I want to share with you today!

This post may contain affiliate links, which means if you purchase through them, I can receive a small commission at no extra cost to you. Read the full disclosure here.
The key to sew fly front zippers... and anything else you desire
The method you are going to learn in this tutorial is the easiest way for a beginner to put a zipper in a fly and it truly takes the stress off the fly zipper sewing, but what actually helped me the most, was changing my mindset.
If your goal is to be able to sew fly front zippers whenever you want, then you gotta decide to stop thinking about it as something “difficult” and be determined to conquer the task ahead one step at a time!
Willingness is such a powerful thing. You can change your perspective from fear and frustration to curiosity and eagerness to learn, by being determined.

Choosing determination instead of focusing on the obstacles, opens the door for you to accomplish whatever you want to do, and will rid you of self-imposed blockages to joyfully step into the magic of creating.
You got this girl! So, let’s conquer this fly front zipper business once and for all.
Here's what you need to start sewing fly front zippers like a pro!
◆ A basic sewing pattern for pants/shorts that you would like to make with a fly front zipper. We are going to draft the fly extension directly to the front pant pattern piece.
Having the extension already built-in on your pattern will make the whole sewing process WAY easier!
Your zipper fly "template" (AKA fly front zipper pattern) will look something like this:
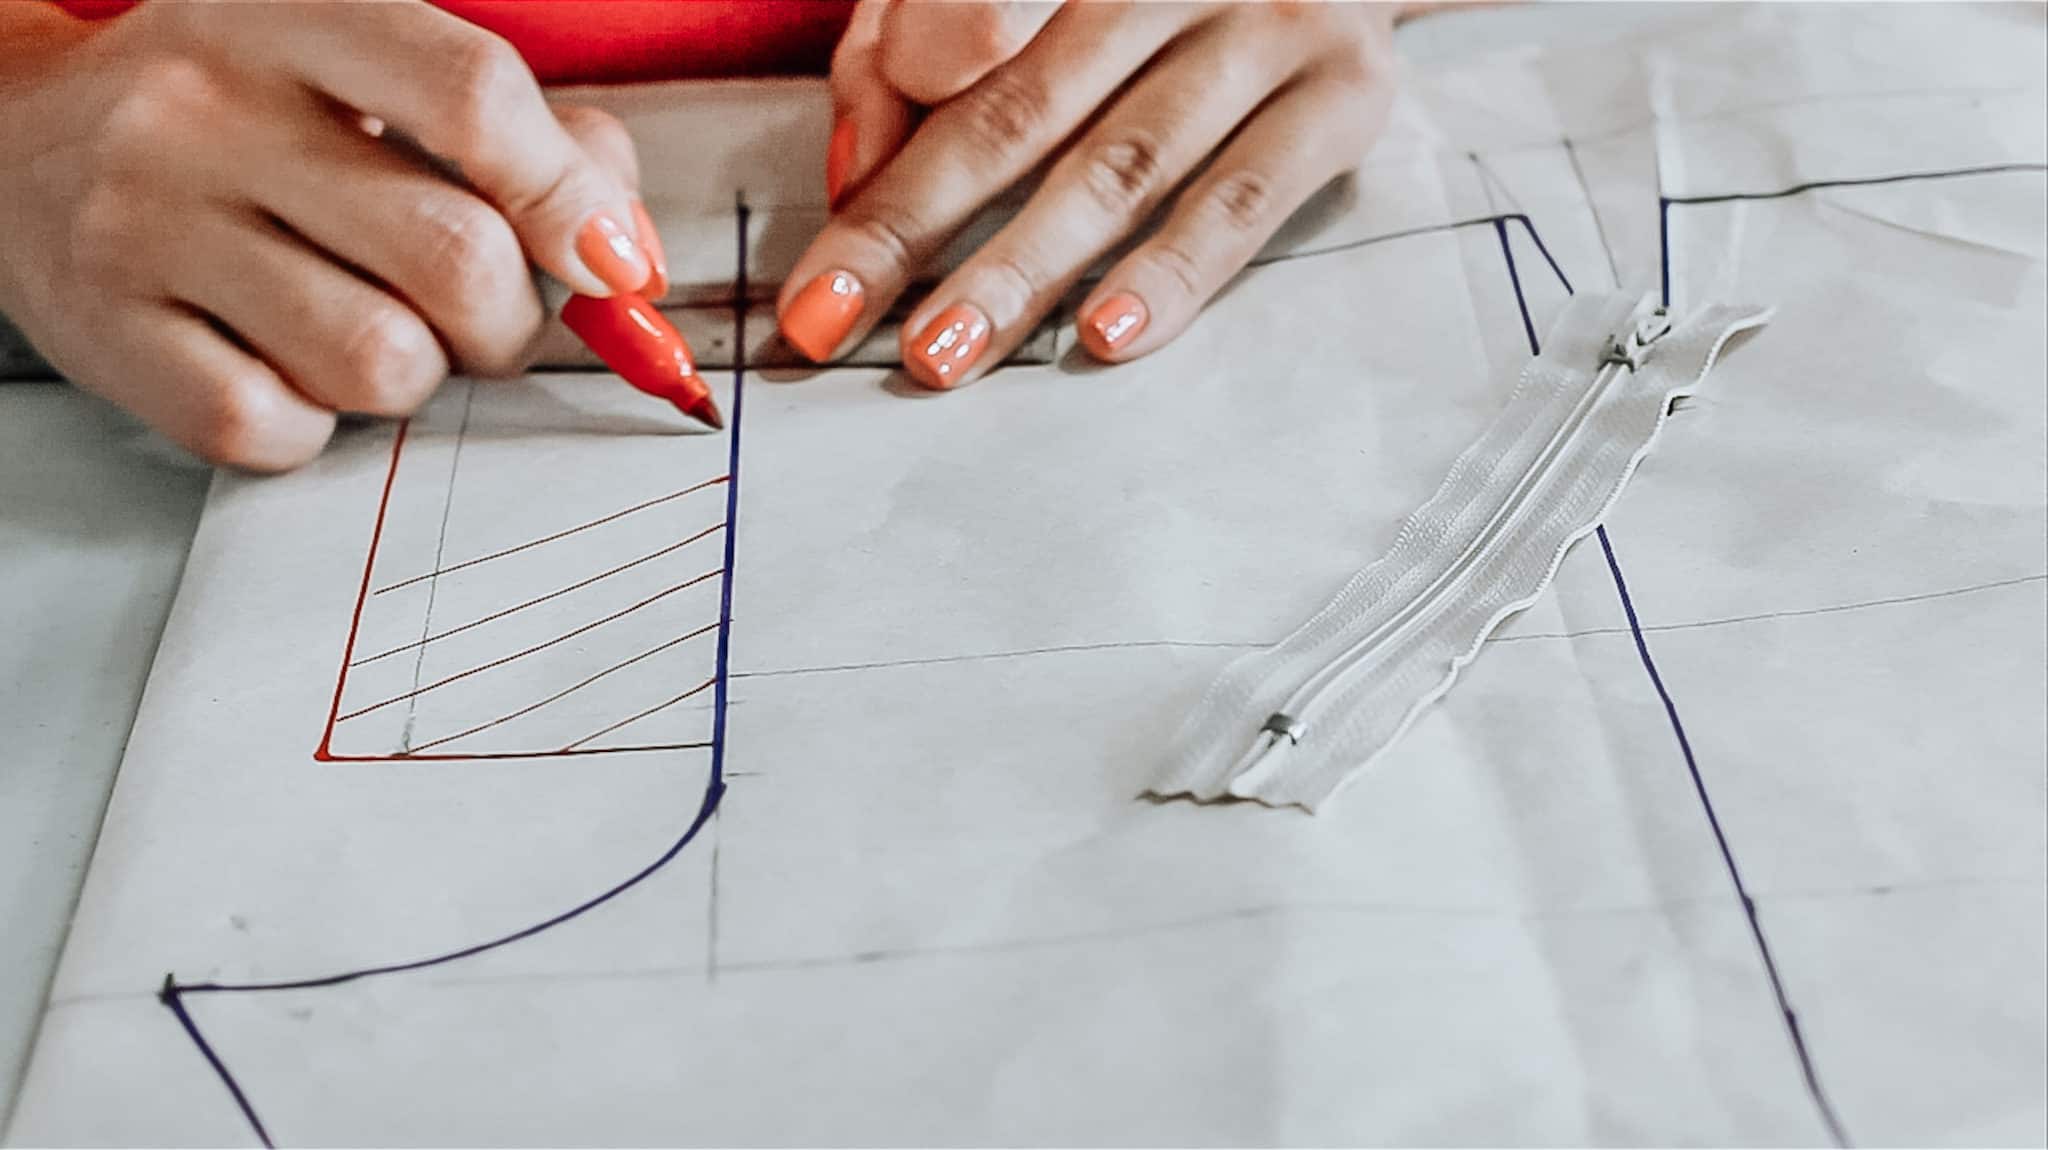
◆ A regular nylon or metal zipper. Select the length of the zipper you are going to use, according to the style and size of your pants. For low rise pants, an 8 to 10 cm / 4″ zipper can be used and high waisted pants call for a 12 to 14cm / 5″ zipper.
If you have a zipper that matches the color of your fabric perfectly but it’s way too long for the pants no worries, you can shorten it following the steps on this video.
Now, if you want to avoid extra steps and get the right length from start, here are some cool packages you can order online that come with different colors and sizes.
- Zipperstop Wholesale YKK Sale 4", 5", 6" and 7" Assorted Zipper
- YKK #3 Skirt & Dress Zips (100 Zippers/pack).
- 100 assorted Length and Colors high quality YKK zippers.
◆ Tricot Fusible Interfacing. Besides the pretty fabric you have chosen for your pants you will also need a little bit of interfacing to add support and stabilize the part where your zipper will be sewn to get a long-lasting and professional result.
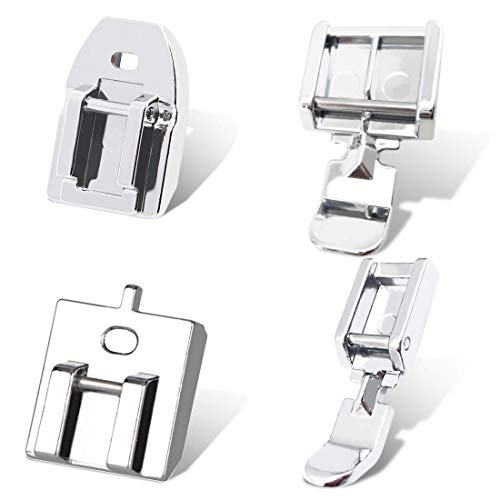
◆ Zipper Foot. It usually comes with your sewing machine, but if you don't have it, check out this beauty I just found: a set that comes with 2 regular zipper feet: one narrow and one wide, any of these 2 can be used for this mission! and you will also get 2 Invisible Zipper Feet for whenever a different project calls for it! (Check if this bundle is compatible with your sewing machine model here).
- ⭐ Package Including -- 1 x invisible zipper foot + 1 x concealed zipper foot + 1 x zipper foot (wide) + 1 x zipper foot (narrow) = 4pcs in total.
- ⭐ Material -- Sewing machine pressure feet set is made from durable metal, anti-rust and bright in color.
- ⭐ Ease of Use -- High quality zipper foot set allows users to create beautiful zippers, and provides them with ease of use for tasks they could be extremely tedious if done by hand.
How to sew a fly front zipper on pants
Once you have your pattern, zipper, zipper foot, fabrics, and the usual goodies like scissors, pins, measuring tape and removable marking tools is time to prepare your pieces and start sewing the fly front zipper!
On the video below you are going to learn:
✧ How to draft a fly front zipper and prepare your fabric in 3 quick steps.
- How do you draft the fly front zipper extension (or zipper fly "template") to the pattern.
- Applying fusible interfacing to add support.
- Pressing the Fly extensions to get them in the “ready to start” mode.
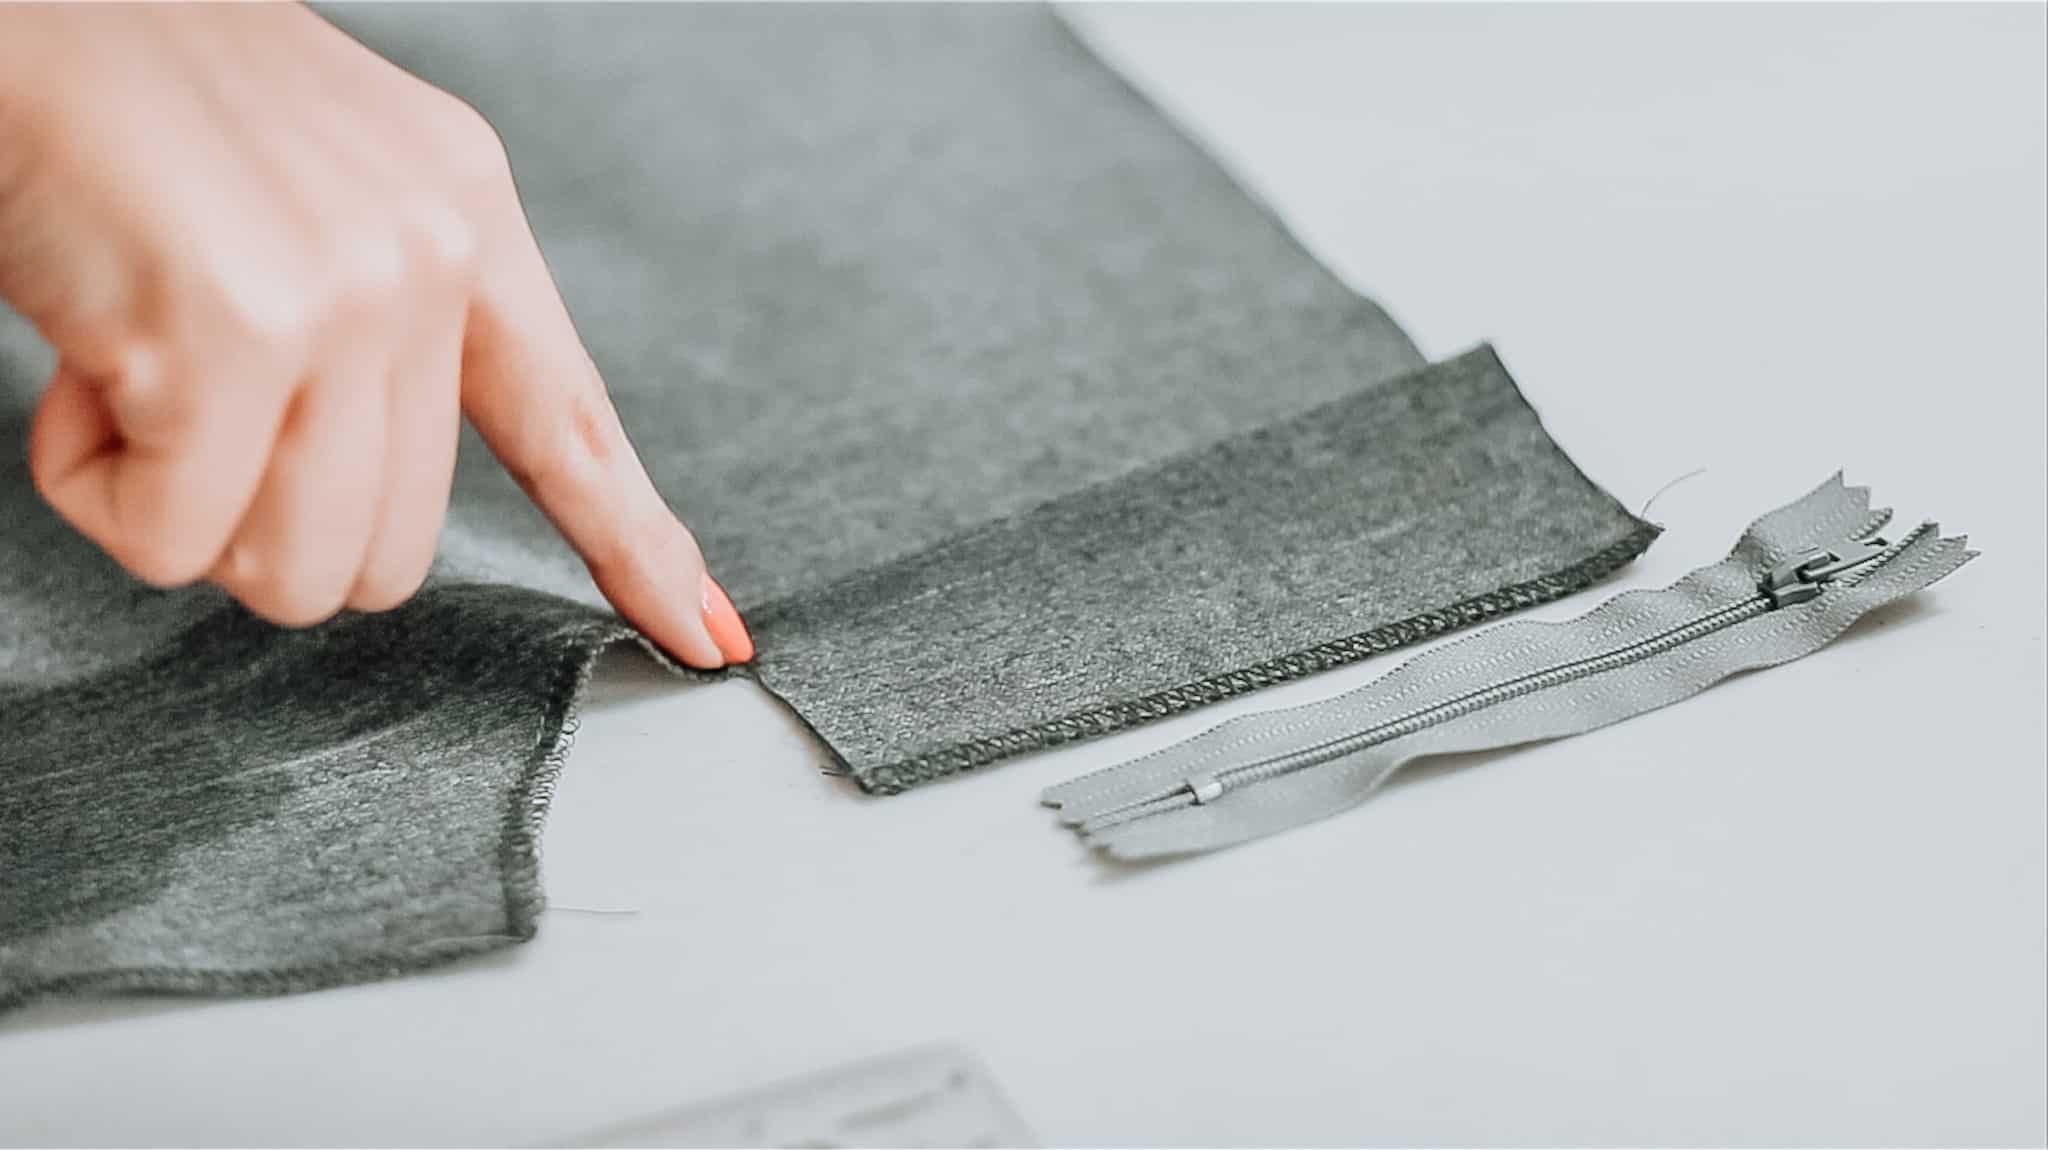
✧ How to sew a fly front zipper for pants in 5 easy steps.
- Sewing the right side of the zipper fly. (3:20)
- Sewing the left side of the zipper fly. (4:56)
- Creating a fly shield. (5:59)
- Sewing the crotch seam. (6:44)
- Topstitching. (7:48)
And that’s the step by step method I use for easy fly front zipper sewing!
If after watching this zipper fly tutorial you sew your first zipper successfully: Let’s celebrate together!! 
- Also read: How to price your handmade products -
Interesting FAQs about zippers
“Fly” refers not to the zipper but to the piece of fabric that covers the zipper.
“Fly” also came to mean “something attached by one edge,” like a flag or banner flying from a rope or pole. With this meaning in mind, 19th-century tailors used the term “fly” for a flap of cloth attached at one end to cover an opening in a garment.
– Source: Rob Kiff at creators.com
YKK, it turns out, is a Japanese company. (It stands for Yoshida Kogyo Kabushikikaisha–far too long to print on a zipper.) It’s got about half of the world’s zipper business. And it has a zipper factory in Macon, Georgia, where they make about 5 million zippers a day.
– Source: Adriene Hill at marketplace.org
Usually, men’s zippers are on the right and women’s are on the left, but nowadays not all the brands follow this “tradition”.
It all started in the late middle age with buttons. “Because of the sumptuary laws, only wealthy women were allowed to have buttons on their clothing”. These women had maids helping them get dressed (while men might do it themselves) so buttons were on opposite sides to make it easier for them.
– Source: Dana Rose Falcone at huffpost.com
What's next?
Tell me in the comments below: What have been some of the biggest challenges in your sewing journey? You are never alone and by sharing them on this community will be easier to help each other!
You are powerful and SO capable, let those feelings of empowerment fuel your soul and rejoice in the magic of creating.
With all my love and a bunch of creative vibes,
This post was all about how to sew a fly front zipper for pants, trousers or shorts. For more DIYs and sewing tutorials check out the “Handmade Product Ideas” section.
was this zipper fly tutorial helpful?
SAVE THIS
PIN TO YOUR "sewing hacks"
board on pinterest 







Leave a Reply